> ## Documentation Index
> Fetch the complete documentation index at: https://docs.intelagent.ca/llms.txt
> Use this file to discover all available pages before exploring further.
# Claim Submission
> Step-by-step guide to submitting hospital reimbursement claims through the IntelAGENT mobile app
## Submit a Claim in 30 Seconds
Submit claims directly from your phone using the IntelAGENT mobile app. The process involves six simple steps:
1. Tap the Claims tab
2. Enter patient MRN and demographics
3. Confirm service details (date, facility, referring physician)
4. Add diagnostic code
5. Add billing code
6. Tap Submit
## Step-by-Step Guide
### 1. Open Claims
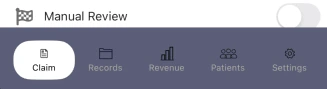 Tap **Claims** in the bottom navigation to open the claim entry screen.
### 2. Enter Patient Details
Tap **Claims** in the bottom navigation to open the claim entry screen.
### 2. Enter Patient Details
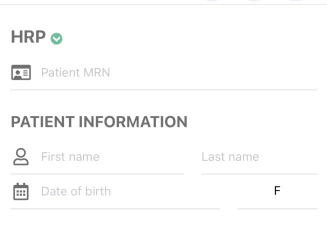 Enter the patient's **MRN** and demographic details including first name, last name, date of birth, and sex.
For William Osler, select **HRP** as the payment program at the top of the screen.
### 3. Confirm Service Details
Enter the patient's **MRN** and demographic details including first name, last name, date of birth, and sex.
For William Osler, select **HRP** as the payment program at the top of the screen.
### 3. Confirm Service Details
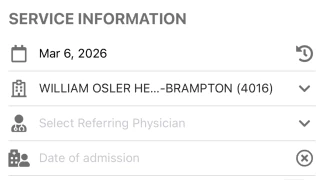 Confirm the following service information:
* **Service date** — defaults to today's date; tap to change
* **Facility** — select the William Osler facility (e.g., William Osler HE... - Brampton)
* **Referring physician** — select if applicable
* **Date of admission** — enter if the service is related to a hospital admission
### 4. Add Diagnostic Code
Confirm the following service information:
* **Service date** — defaults to today's date; tap to change
* **Facility** — select the William Osler facility (e.g., William Osler HE... - Brampton)
* **Referring physician** — select if applicable
* **Date of admission** — enter if the service is related to a hospital admission
### 4. Add Diagnostic Code
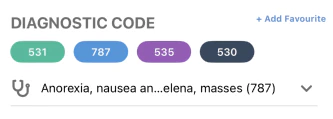 Select the diagnostic code that explains the clinical reason for the service. You can search by code number or description.
If you don't see the diagnostic codes you need, go to **Settings** and press **Refresh Cache** to update your local data.
### 5. Add Billing Code
Select the diagnostic code that explains the clinical reason for the service. You can search by code number or description.
If you don't see the diagnostic codes you need, go to **Settings** and press **Refresh Cache** to update your local data.
### 5. Add Billing Code
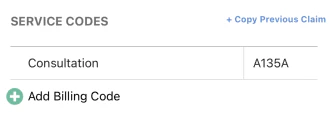 Enter the appropriate OHIP billing code and adjust units if required. You can tap **+ Add Billing Code** to add additional service codes to the same claim.
Use **+ Copy Previous Claim** to quickly duplicate billing codes from a recent claim.
### 6. Submit the Claim
Enter the appropriate OHIP billing code and adjust units if required. You can tap **+ Add Billing Code** to add additional service codes to the same claim.
Use **+ Copy Previous Claim** to quickly duplicate billing codes from a recent claim.
### 6. Submit the Claim
 Review the claim details and the total claimed amount, then tap **Submit Claim**. You can also tap **Save Draft** to save the claim and submit it later.
## After Submission
Once your claim is submitted:
* The claim status will show as **Pending**
* At the end of the billing cycle, accepted claims will move to **Paid** status
* You will receive payment directly from IntelAGENT to the bank account you have set up with William Osler
## Tips
* **Double-check the MRN** — ensure you have the correct patient medical record number before submitting
* **Submit promptly** — you have 60 days from the service date to submit your claim
* **Use drafts** — if you're unsure about any details, save as a draft and complete later
Review the claim details and the total claimed amount, then tap **Submit Claim**. You can also tap **Save Draft** to save the claim and submit it later.
## After Submission
Once your claim is submitted:
* The claim status will show as **Pending**
* At the end of the billing cycle, accepted claims will move to **Paid** status
* You will receive payment directly from IntelAGENT to the bank account you have set up with William Osler
## Tips
* **Double-check the MRN** — ensure you have the correct patient medical record number before submitting
* **Submit promptly** — you have 60 days from the service date to submit your claim
* **Use drafts** — if you're unsure about any details, save as a draft and complete later