
Overview
The Patient List allows you to manage patient rosters, associate patients with facilities, and streamline billing for recurring patients.Accessing Patient Rosters
Click Patient Rosters in the sidebar navigation, under Roster.Viewing Patients
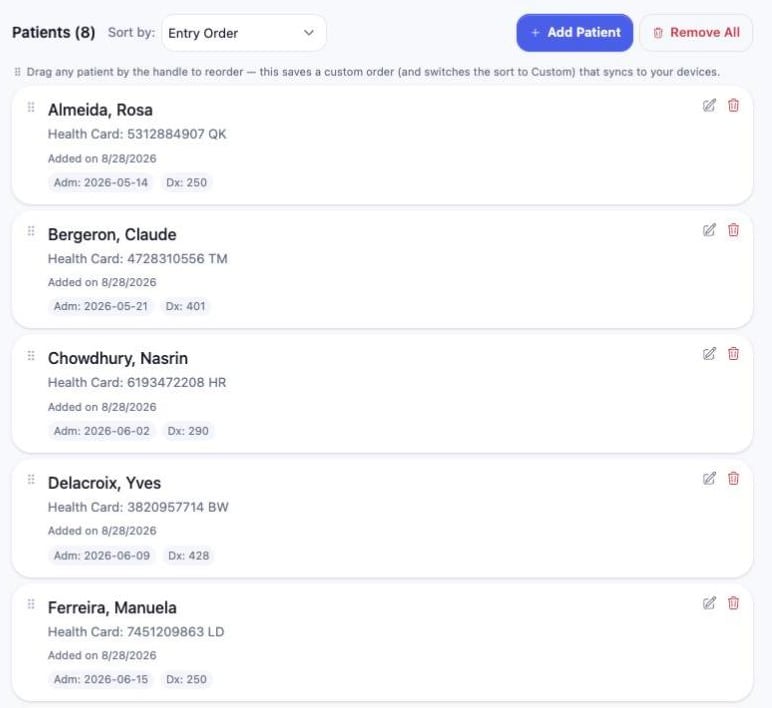
The patient list displays:- Patient name
- Health card number
- Associated facility
- Roster membership
- Last service date
Managing Rosters
What is a Roster?
A roster is a group of patients associated with a specific facility or billing configuration. Rosters are useful for:- Clinic patients seen regularly
- Long-term care facilities
- Group billing scenarios
Creating a Roster
- Click + New
- Enter the roster name
- Select the associated facility (optional)
- Choose the MOH group, or leave it on Solo billing
- Configure default billing codes (optional)
- Click Create Roster
Adding Patients to a Roster
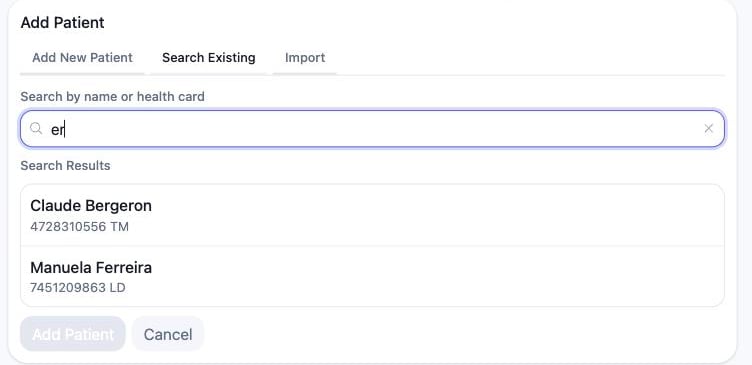
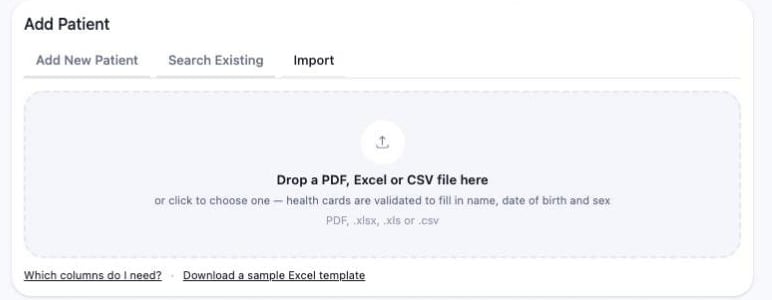
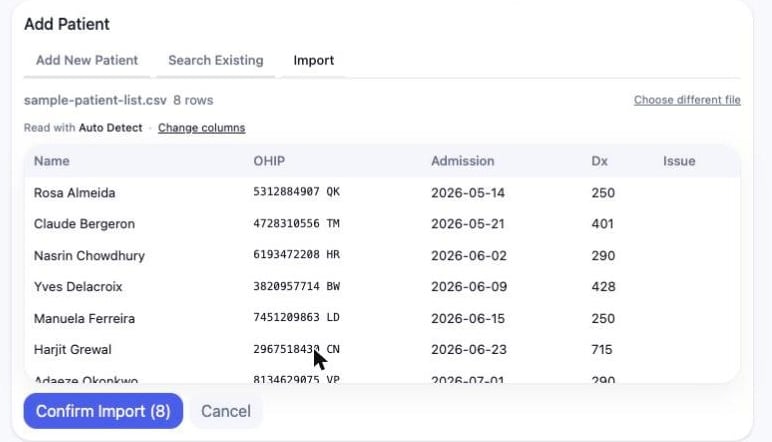
Select the roster, click Add Patient, then pick one of the three tabs.- Add New Patient
- Search Existing
- Import
- Enter the health card number and version code
- Click Validate Health Card & Load Demographics — or fill in the name, date of birth and sex by hand
- Click Add Patient
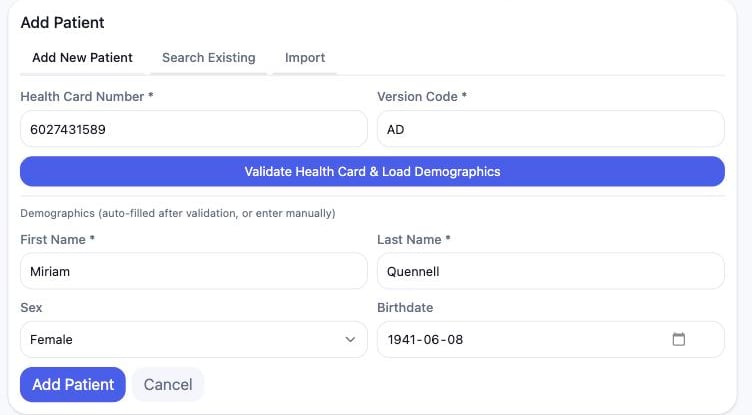
A new patient entered by hand
Importable Columns
The importer auto-detects columns by their header, so you don’t have to map fields manually. Any of the accepted header names work, in any order, and extra columns are ignored — so a hospital census or rounds report (Meditech, Cerner) imports as it comes out of the system. Click Which columns do I need? on the import screen to see the same list in the app.Only the health card is required — everything else is optional. Click Download a sample Excel template on the import screen for a pre-formatted spreadsheet with every column.
Removing Patients
- Find the patient in the roster
- Click the remove icon
- Confirm removal
Removing a patient from a roster doesn’t delete their records or claims.
Editing a Patient
Click the pencil icon next to a patient in the roster to edit their details.- Demographics (name, date of birth, sex) update the shared patient record.
- Admission date and Diagnostic code are saved as per-roster defaults for that patient — they apply only to this roster, so the same patient can have different defaults in different rosters. You can re-run health-card validation from the edit form to refresh the name, date of birth, and sex.
Admission date and diagnostic code defaults
These two fields act as fallbacks for the billing sheet:- When you create a claim for the patient and they already have a claim on that service date, that claim’s admission date and diagnosis pre-fill the billing sheet.
- When they have no prior claim, the roster default admission date and diagnostic code pre-fill instead.
Billing Code Associations
Assign default billing codes to a roster:- Select the roster
- Click Manage Billing Codes
- Add or remove billing codes
- These codes will pre-populate when creating claims for roster patients
Facility Associations
Each roster can be associated with a facility:- Claims for roster patients default to this facility
- Useful for multi-location practices
- Can be overridden on individual claims
Filtering and Search
- Search by patient name or health card number
- Filter by roster
- Filter by facility
- Sort by name, last visit, or health card number
Bulk Actions
Select multiple patients to:- Move to a different roster
- Create claims for all selected
- Export patient list